Ever stared at a record store shelf and imagined your face on the spine? That moment is rare for most. It usually requires a label, a budget, and a lot of luck. Technology changed the game. You don’t need a studio complex anymore. You just need the will to hit record.
If you can use a mouse, you can produce music. The barrier to entry has never been lower.
The Hardware Reality
You already own the most important tool. Your computer is the backbone of modern recording. You don’t need a sprawling room filled with analog gear. You need software. That is the heavy lifter.
For a small investment, you can buy a digital recorder. These boxes handle the messy stuff. They take care of recording, mixing, and mastering. They also burn the disc. It is a neat package. You still have to play the instruments though. The machine doesn’t write the songs for you.
Why Bother DIY?
Why go through the trouble? Why not just stream everything?
Because owning the physical product feels different. It is tangible. It is proof of work. When you press that button on the software, you are taking control. You are bypassing the gatekeepers. You are the label, the engineer, and the artist.
The Basics of Production
This guide covers the fundamentals. We are talking about the entire pipeline. It starts with planning. Then comes the recording. Finally, you need to understand the tools.
You don’t need a studio complex anymore. You just need the will to hit record.
The process is linear but forgiving. You can tweak things. You can redo parts. The digital realm allows for second chances. Analog tape did not offer that luxury. Mistakes were permanent. Here, they are just layers.
Understanding the Tools
What are you actually using?
- DAWs (Digital Audio Workstations): The software that records and edits.
- Audio Interface: Connects your instruments to the computer.
- Microphones: Captures the sound.
- Speakers/Headphones: Lets you hear what you are doing.
You do not need the most expensive gear. You need gear that works. Start simple. Expand later.
The dream of seeing your CD on a shelf is no longer a fantasy. It is a logistical problem. You solve it one track at a time.

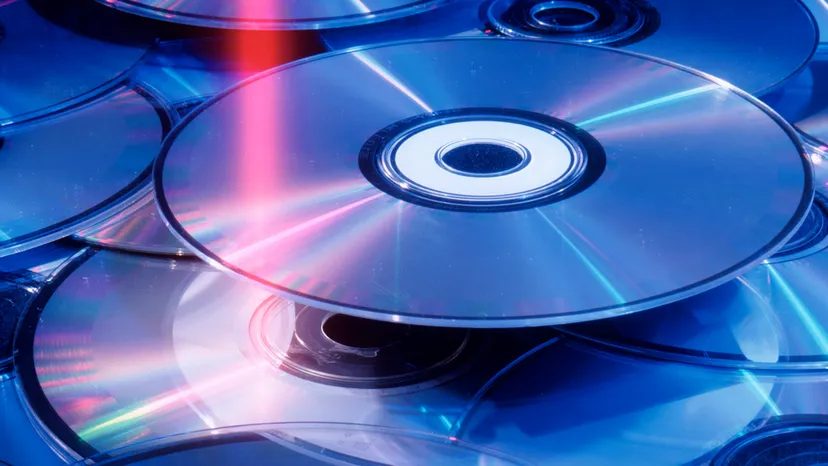
Back in the day, making a CD was a financial gamble. You needed serious cash for studio hours, hired engineers, and session musicians if you played solo. Then came the 1970s cassette boom. Tapes were cheap and recordable. You could burn copies of anything. The trade-off? Audio quality often sounded like it was recorded in a tin can.
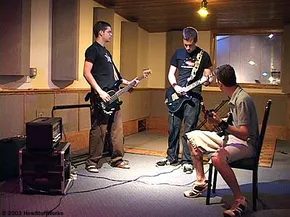
Today is different. Even a novice can produce a high-fidelity CD. You don’t need a major label advance. You can record high-quality digital audio using inexpensive equipment from your house. Or your garage. Or your attic. The barrier to entry has collapsed.
For those who consider themselves technologically impaired, here is the good news. You do not need special engineering skills. Old-school recorders demanded trained ears and steady hands. Now, computers and digital systems handle the heavy lifting. All you need to read and follow instructions. You get total control over your sound. And since burning copies costs almost nothing, you can hand them out freely. Shameless self-promotion is encouraged. Sell them at gigs or online for profit.
The Garage Band Origin
The phrase garage band has a literal history. Unsigned groups practiced in the garages of members who could not afford rent. Money was scarce. Space was free. It took a record contract to escape the driveway and enter a real studio. Today, that garage is the studio.
Choosing Your Studio Space
You have a few options when deciding where to record your DIY CD production.
- Professional Studio: High cost. High quality. You pay for their gear and expertise.
- Home Studio: Low cost. You control the schedule. Sound quality depends on your room treatment.
- Garage: Free. Often poor acoustics. Prone to outside noise like traffic or lawnmowers.
If you are on a budget, your home or garage is the place to start. The key is managing your environment. You need to minimize echo. You need to block street noise. A closet full of clothes can work in a pinch. It acts as a natural sound absorber.
Essential Equipment for Home Recording
You do not need a mixing board worth more than a car. Start small.
- Computer: Any modern laptop will do.
- Audio Interface: This connects your instruments or microphones to the computer. Look for a USB model with at least two inputs.
- Microphone: A large-diaphragm condenser mic works for vocals and acoustic instruments.
- Headphones: Closed-back headphones prevent sound from leaking into the recording.
- Software (DAW): Digital Audio Workstations like GarageBand (Mac) or Audacity (free) are great entry points.
Why Record at Home?
Why do musicians choose to record at home? Time is money. In a pro studio, you pay by the hour. If you hit a snag, you lose cash. At home, you can record at 3 AM. You can take a break. You can redo a line ten times without watching the clock.
The creative freedom is unmatched. You can experiment with weird sounds. You can layer vocals until they sound like a choir. No one is judging your process. You are the
Four steps stand between a live gig and a shiny disc in your hand.
Recording. Mixing. Mastering. Burning.
Skip any one, and you aren’t making a product. You’re making noise.
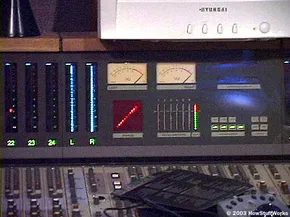
To cut your own CDs, you need gear that handles all four. There are three ways to build this pipeline. The first is the old-school route.
Component-Based Hardware Systems
This is the analog dream. Or nightmare. Depending on who you ask.
It involves separate pieces of hardware for every single task. You need a recorder. A mixer. Effects units. A disc burner.
You’re dealing with an assortment of equipment. Cables everywhere. Signal flow complexity that would make a young engineer cry.
This is the traditional-style setup. You see it in professional recording studios. Big desks. Big gear. Big budgets.
It works. It’s reliable. It’s also expensive and takes up half a garage.
“You’re dealing with an assortment of equipment… common in recording studios.”
If you have the space and the cash, this is the way. But most people don’t. They look for something simpler. Something that fits on a desk.

The Computer Route: Cheap, Flexible, But Demanding
You don’t need a million dollars to make a record anymore. Just a powerful computer and some patience.
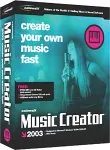
PCs handle recording and CD-burning software like champs. You can mix tracks, slap on effects, and burn the final disc without leaving your desk. The math is simple. If you already own a computer, you aren’t buying the studio. You’re just buying the keys to drive it. That cuts costs significantly compared to assembling a component-based setup from scratch.
Sure, the software and extra gear add up. You’re looking at programs like Cakewalk or EMagic. Prices range from a modest $100 to over $800. It’s steep for code, but way cheaper than renting a professional studio or buying analog gear.
Here’s the trick: don’t buy blind.
Download the trial versions. Test the waters. See if you can actually navigate the interface before you hand over your credit card info.
There are catches, though. You need decent computer skills. These programs aren’t intuitive magic boxes. They take time to master. And portability? Only if your computer is a laptop. A desktop tower is not a portable studio.
Mac users have an easy out. Apple’s GarageBand is built right in. It’s free. It works. Just open it up.
Workstations: All-in-One Powerhouses
If software feels like too much homework, look at studio workstations.
These are portable units that pack almost everything you need into one box. Roland and Boss make them. They are designed to cut your own CD in one go.
Check out the Boss BR1180CD Digital Recording Studio with Internal CD-R Drive. That’s the gold standard for what we’re talking about. It offers nearly all the tools of a full-blown studio.
The cost? Roughly the same as a computer setup.
But the experience is different. With a digital workstation, you get system-wide memory. Minimal setup. No messy wiring. Real portability. You can roll it into a coffee shop or a bedroom and start recording immediately.
There are downsides. You might still need to buy an external CD burner. And a small display screen. It’s not always fully self-contained.
You have to investigate. There are a lot of workstations out there. Find the one that fits your workflow. Don’t just pick the first box you see.
Cutting Your CD

The Four Stages of Music Production
You don’t need a million dollars to make a record. You just need to understand the workflow. There are really only four steps: recording, mixing, mastering, and burning. Here is the breakdown on each one.
Recording
Whether you are capturing vocals, guitar, or drums, a recording device saves the individual tracks and lets you play them back. Depending on the recorder, you might be saving sound on a hard disk, a memory card, a digital tape, or a CD.
So you need a way to capture sound and route it to the recorder. The studio workstation, mixer, or computer is the recorder.
When you record vocals, you use a microphone. The mic connects to an input jack on your computer, mixer, or studio workstation. The noise you make enters the equipment through that jack.
Electric instruments work similarly. Instead of a mic, you plug your electric guitar, bass, drum machine, or synthesizer right into the recording device.
If you want to record music already on a CD or cassette, you can do that too. Just connect a tape player or CD player to your recorder and hit Play. You are taking music from one source and making it available on another. Any program will have complete instructions. You have a lot of leeway here.
Mixing
After you’ve recorded, you blend everything together. You mix vocals with guitar, bass, drum, and other instrument tracks.
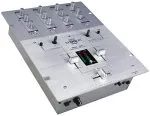
The mixer gives you control over volume and sound of each track. You set the volume of each track in relation to others. You can make the vocal track louder than the guitar track in the final mix. Without mixing, the guitar might drown out the voice.
The main goal of mixing is to balance your track levels. Whatever mixer or computer program you use gives guidelines for adjusting sound levels.
During mixing, you need to pan the tracks. Sound comes from two separate speakers. During panning, you adjust each sound to come from the ideal place. Lead vocals and guitar often sit in the center. Background harmonies come out of the sides. Controls on your mixer let you experiment to find the best configuration.
You can also adjust equalization or EQ. EQ is the tone of the music. It is similar to bass and treble knobs on a car stereo. On recorded tracks, you select an element of sound and change its tone. Make high vocals sound deeper. Make the bass line pound harder.
Depending on your mixer, you can add effects. If your mixer lacks this, buy an extra program or external effects machine. There are many effects to alter sound. The right effects turn a home-grown CD into a professional album.
Mastering
Once you’re done mixing, prepare the mix for transfer to a CD. Mastering means going over the recording one more time. Make sure everything sounds the way you want before putting it on disc.
Mastering has three main ideas:
- Identify and fix problems in your music. Listen carefully to the final mix. Check overall levels. Work with track volumes.
- Check the overall EQ. Make volume corrections by equalizing as well as setting levels. Ensure the tone is what you are going for. Experiment until you find the perfect spot.
- Add track markers to your CD. Up to now, “track” referred to a part of your music, like a vocal or guitar track. Now it refers to an individual song. If your CD has more than one track, put a marker at the beginning of each one. This tells the CD player where each song starts. Your equipment will have directions for this.
Burning
Time to burn your masterpiece. The CD burner may be independent, part of a computer, or built into a studio workstation.
There are two types of CDs you can use. Most burners use CD-R or CD-RW. CD-R discs cannot be erased once burned. The music CDs you buy in stores are CD-R. CD-RW discs can be erased so you can reburn them.
Burning a CD is easy. The only major decision is whether to burn the entire CD at once or one song at a time. Adding one song at a time lets you burn different versions of the same song onto one CD. You can build the album one song at a time, burning tracks as you complete them.
For more information on cutting your own CD, check the links on the next page.
Effects
An effect is a type of processing that takes an original sound and alters it. Effects that replace the original sound altogether are called insert effects. Effects added to the existing sound are called loop effects.
A few commonly used effects include:
Reverb – Short for reverberation. Reverb recreates what music would sound like in a specific physical space, such as a stadium or club. It creates the effect that sound is being heard in a particular place.
Delay – A delay is a copy of a sound added to the original sound with a slight delay. This effect can be used with vocals to make it sound like more than one person is singing.
Chorus – A chorus creates multiple delays. This is often used on guitar tracks to make the sound seem expansive.
How Amp and Mic Modeling Tricks Your Ears
Modeling isn’t just a buzzword in modern music production. It’s a deception. A clever one. It takes a sound and makes it appear to be something it is not. You plug into a digital interface or a processor and suddenly you are hearing magic. The hardware doesn’t care. The signal is identical. The result is different.
Take microphone modeling. You can plug a cheap dynamic mic into an interface with this feature enabled. The software analyzes the input. It applies filters. It adds harmonic distortion. Suddenly that $50 microphone sounds like a $2,000 studio condenser. You get the warmth. You get the presence. You don’t get the $2,000 price tag.
Then there is guitar. Or bass. Any stringed instrument. Amp modeling takes a plain guitar signal. A dry, dead signal. It runs it through virtual circuits. You get the crunch of a vintage Marshall. The clean chime of a Fender. The hiss. The thump. The air moving in a room that doesn’t exist.
“Modeling plays with a sound to make it appear to be something it’s not.”
This isn’t about faking it for bad reasons. It’s about access. It’s about getting the tone without hauling heavy cabinets. It’s about changing sounds instantly. Roland Corporation has been at the forefront of this for decades. Their tech allows you to sculpt tone with precision. You aren’t limited by the physical speaker cone in front of you. You are limited by your imagination.
Why does this matter? Because gear is expensive. Good gear is very expensive. Modeling democratizes the sound. It puts high-end textures into the hands of producers who can’t afford a vintage Neumann or a ’59 Bassman. It levels the playing field. You hear the difference. Your audience hears the difference. They just don’t know it’s synthetic.
Where to Dig Deeper
If you’ve already absorbed the basics and are looking for the nuts and bolts of the industry, the resources listed below offer a granular look at how the machinery actually turns.
You can start with the foundational logistics. How the Club Circuit Works breaks down the tour life. It’s not just about playing; it’s about load-ins, door deals, and the specific hierarchy of support staff that keeps a show moving. Pair that with How Band Equipment Works to understand the gear on stage. You’ll see how the pedalboard connects to the amp, and how that signal hits the stage monitors.
The business side is often more opaque. How Record Labels Work explains the funding model. It’s not just printing vinyl. It’s about recoupment, marketing budgets, and who actually owns the masters. For those navigating the legal minefield, How Recording Contracts Work and How Musician Royalties Work are essential reading. They clarify the difference between a master rights payout and a mechanical license.
Then there is the hardware. How Electric Guitars Works and How Acoustic Guitars Work get into the wood and wire. You’ll learn why a humbucker sounds different than a single-coil. How Amplifiers Work and How Speakers Work explain the physics of sound projection. It’s all about impedance, wattage, and cabinet design.
The medium matters too. How CDs Work details the digital encoding process, while How Analog and Digital Recording Works contrasts magnetic tape with binary data. This evolution leads directly to How File Sharing Works, which contextualizes the shift from physical sales to streaming and the subsequent legal battles.
For ongoing reference, keep these directories handy:
– All Music Guide for discography verification.
– ARTISTdirect for independent artist resources.
– Recording-Engineer.net for technical troubleshooting.
– Audio Amigo for gear comparisons.
– Boss Music Equipment for specific pedal and amp specs.